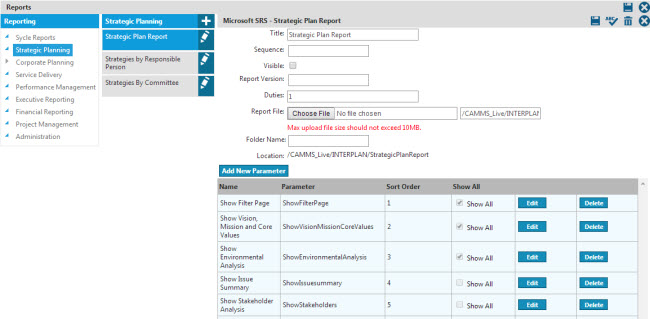
STEP 1: Select 'Crystal Report' as report type and fill in the required fields.

*‘Report Category Group’ tree - This hierarchy tree lists the report categories, a report can be uploaded against. User is allowed to change the respective category through this selection tree.
|
Field |
Selection |
Mandatory/Optional |
|
Report Type |
Select type as ‘Crystal Report’. |
Mandatory |
|
Title |
Define a name for the report (This will be displayed in the reports area). |
Mandatory |
|
Sequence |
Input a number to define the order of the new report among the existing report list visible in cammsstrategy > Reporting > Relevant reporting area. |
Mandatory |
|
Visible |
Tick the box to make the new report visible in cammsstrategy > Reporting > Relevant reporting area. NOTE: This is ticked by default. If unticked, report will not be visible. |
Optional |
|
Report Version |
Define a report version for the report. For example, if it is a second version to an existing report, the user can enter either 1.1 or 2 as the version number. NOTE: This value is only visible within the application. |
Optional |
|
Report File |
Browse and select the new report file to be uploaded NOTE: o Maximum file upload size should not exceed 10MB o Crystal Report file should be in .rpt format |
Mandatory |
|
Location |
This will display the server location where the report is saved. NOTE: o The location value will only be displayed in the screen once the user clicks on ‘Save’ o Crystal reports will be saved in a default location within the Application server itself |
- |
STEP 2: Click "Save" to upload the report.
Copyright © 2014-2015 CAMMS Online Help. All rights reserved.
Last revised: November 26, 2017