The fields visible in this area will depend on the configurations completed by your Administrator.
The Quick Project Update option allows you to update project details. This is the quickest and easiest method to update the project. details.
|
The fields visible in this area will depend on the configurations completed by your Administrator. |
Follow the steps below to update project details using Quick Update option.
STEP 1: First navigate to Project Register from quick navigation menu. Then tick the check boxes adjacent to the projects (in Quick Update Column) to be updated.
STEP 2: Click the 'Quick Update' button.
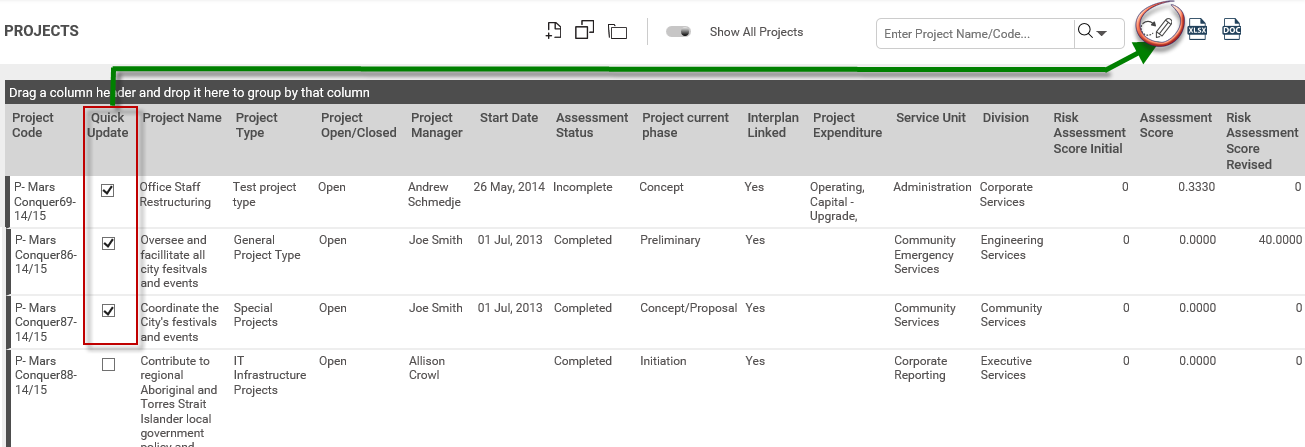
STEP 3: The Quick Update option opens each selected project according to the order those projects were listed in the Project Register. The following screen is displayed for you to update the project and associated task details.
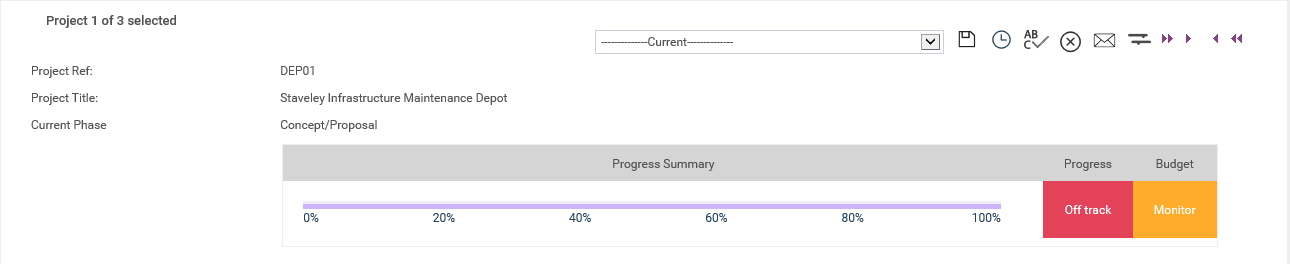
The Project Quick Update screen has the following toolbar options.
|
Toolbar Option |
Description |
|
|
Moves to the first project within the Project Quick Update page. |
|
|
Moves to the previous project. |
|
|
Moves to the next project. |
|
|
Moves to the last project record. |
|
|
Displays the project update history. |
|
|
Saves the updated details. |
|
|
Send Email Updates |
|
|
View Project Schedule |
|
|
Closes the project update view. |
Following controls are available in the Quick Update page.
|
Control |
Description |
|
Start |
Calendar control to change project start date. |
|
Completion |
Calendar control to change project completion date. |
|
Append Task Comment |
Use this control to add task comments to the Project Comments text box. |
|
Edit |
Opens task update window. |
STEP 4: To update the task details, click on the 'View current schedule' icon. This will load the task planning Gantt chart displaying the current schedule. Refer Task planning section for more information.
|
|
Business Rules
|
STEP 5: You can compare the current project status against a specific date via quick update. This will include the history date & time with the modified staff member name.
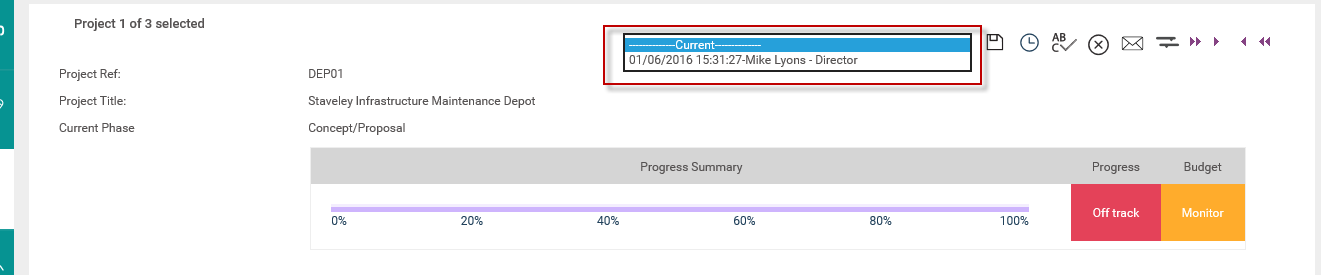
Default is always set to ‘Current’, where existing quick update behaviour will be maintained.
When you select a specific date from the drop-down, then history details will be displayed below the current fields.
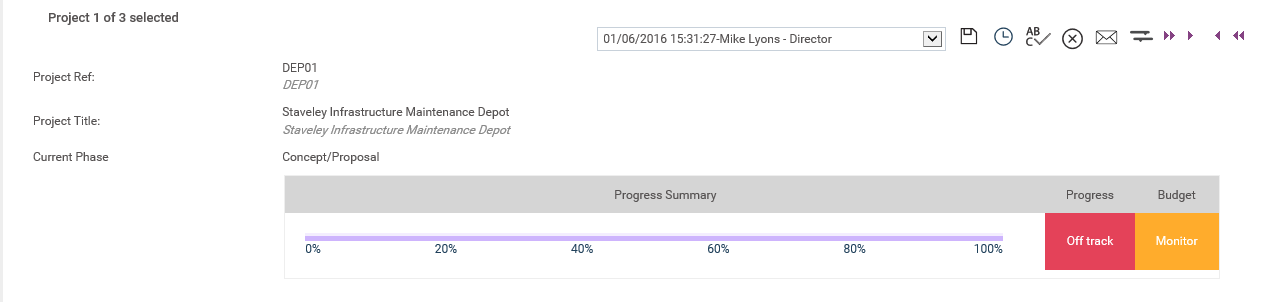
When viewing history data, current behavior can still be edited (if you have edit permissions).
STEP 6: Once the task details are updated, save the modification by clicking on the 'Save' icon and close the pop-up.
STEP 7: Click 'Save' located at the top toolbar to save the project progress updates.
STEP 8: Use the arrow icons to move to next/precious project.
STEP 8: Close the quick update view by clicking on the 'Close' icon.
Copyright © 2014-2015 CAMMS Online Help. All rights reserved.
Last revised: November 26, 2017