Go to Tools -> Executive -> Build.
There are two methods to create Executive Reports:
Click on 'New' button on Executive Reports page to start creating the report. The application screen displays a page to enter name and reporting period for the new report.

STEP 1: Enter a suitable name in the 'Name' field.
STEP 2: Define the reporting period by entering the relevant dates to the 'Date From' and 'Date To' fields. The content for the report is taken within this specified period.
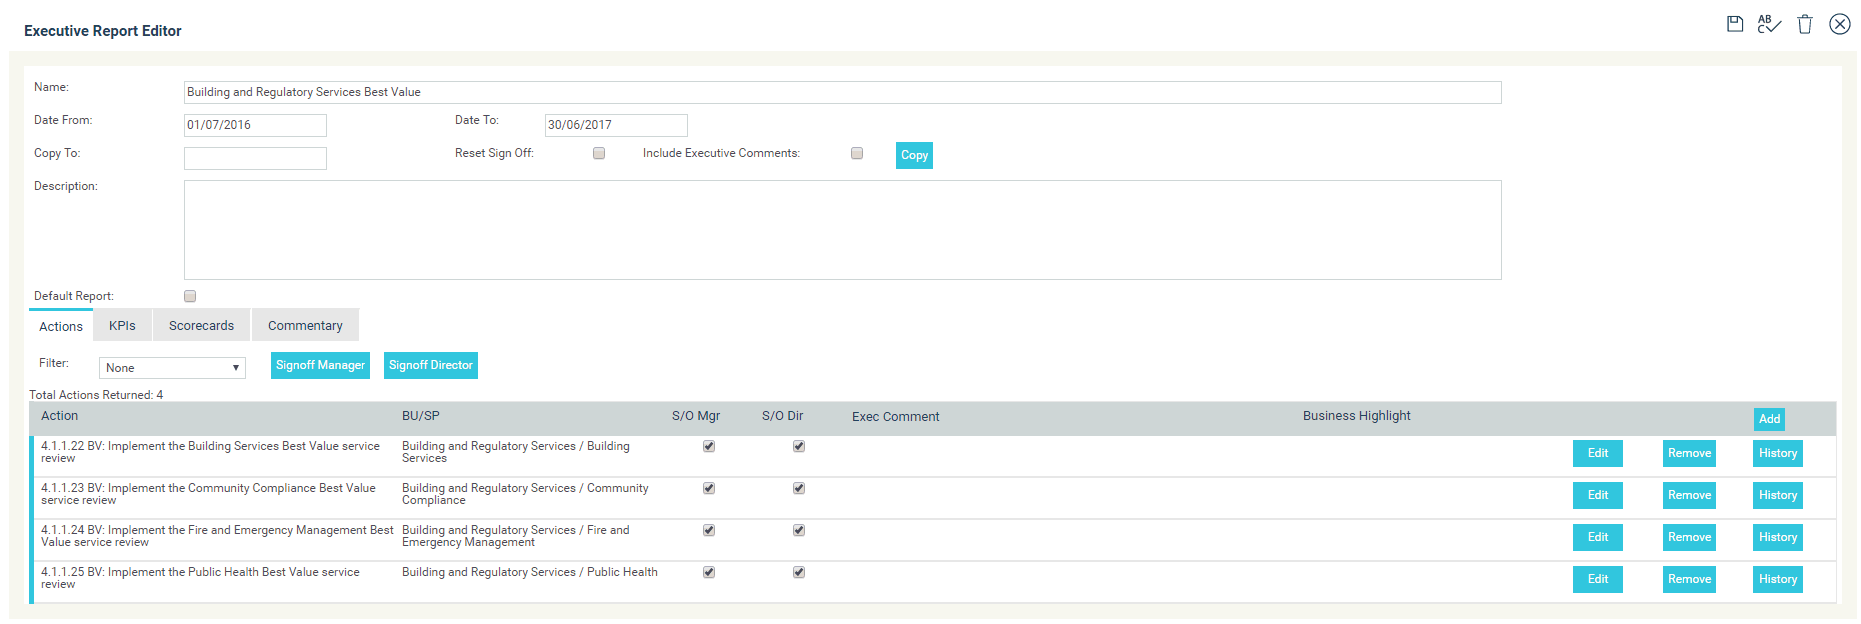
STEP 3: Click the 'Save' icon to save the report in the database. Once the page refreshes, the Executive Report Editor is displayed with individual tabs for Actions, KPIs, Scorecards and Commentary. Organise the data in the report using these tabs.
STEP 4: Use the spell-check feature to correct any spelling mistakes in the reports.
The second method to create a report using the structure of an existing report and populate it with data according to requirements.
STEP 1: Click Edit button alongside a particular report that needs to be duplicated. The system displays the Executive Report Editor page.

STEP 2: Define a reporting period by entering the relevant dates to the 'Date From' and 'Date To' fields.
STEP 3: Enter a new title for the report in the 'Copy to' field. Using 'Copy' icon, you can create a new report based on the existing one.
STEP 4: The content of a report needs to be approved by Managers/Directors by giving a sign off. When a duplicate is created the sign off details of the original report is also copied to the duplicate. Remove all existing sign off details from the duplicate by ticking the "Reset Sign off’ check box. Skip this step if the newly generated report also needs to be signed off by the same managers/directors of the original report.
STEP 5: You can select all the executive comments to be copied to the new report by ticking 'Include Executive comment'.
STEP 6: Click 'Copy' button to create a duplicate report. Once the page refreshes, the Executive Report Editor is displayed with individual tabs for Actions, KPIs, Scorecards and Commentary. Organise the data in the report using these tabs. Use the spell-check feature to correct any spelling mistakes in the reports.
STEP 7: You can include a description for the report using the space given for 'Description'.
STEP 8: If you wish to assign this report to be displayed as default report when you access the executive portal, you can tick the check box against 'Default Report'.
STEP 9: Click the 'Trash' Can icon at the top right corner which is visible throughout the build area to delete the current report.
STEP 10: Clicking the 'Close' icon displayed at the far top right closes the current record. Ensure that all data entered is saved prior to clicking this button.
Copyright © 2014-2015 CAMMS Online Help. All rights reserved.
Last revised: November 26, 2017