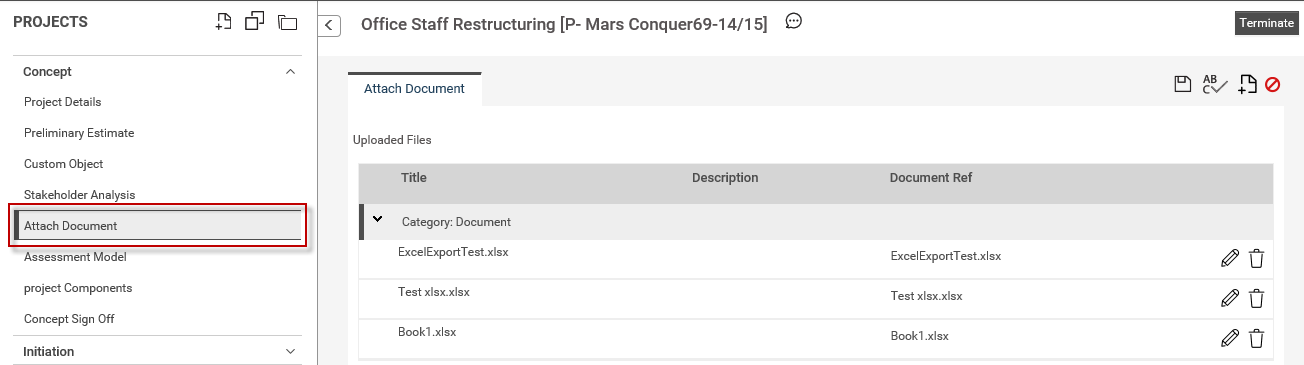
The Attach Document object can be used to;
In order to add a new document or an URL, first click on the add button. Then select the required upload type.
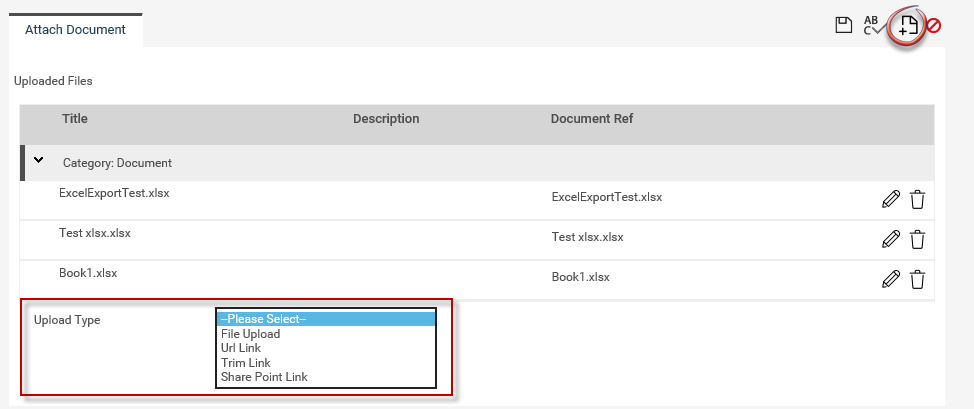
Upload a File

STEP 1: Select 'File Upload' from the Upload Type dropdown. Then click on the 'Select' button.
A pop-up window will be displayed from where you could select the document that needs to be uploaded.
STEP 2: Clicking on the 'Add' button will add the file to the document list. Similarly, multiple documents can be included.
STEP 3: To upload the document, click on the 'Upload' button.
STEP 4: Click on the 'Save' icon.
 |
The maximum file size that can be uploaded is 20MB (for each file). |
Add a TRIM link
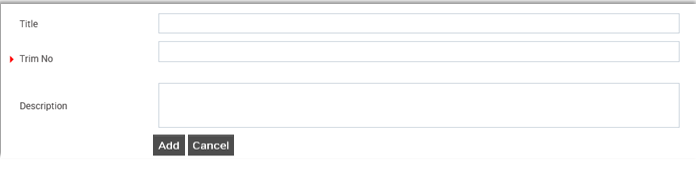
STEP 1: Select ‘Trim Link’ from the Upload Type dropdown.
STEP 2: Enter the TRIM number of the specific document.
STEP 3: Selecting ‘Always Show Latest Document’ will allow you to view the latest version of the document. Also, this would update the linked document as TRIM version changes.
STEP 4: Click on the 'Add' button will add the trim link to the list. Similarly, multiple links can be added.
Adding a Share Point Link
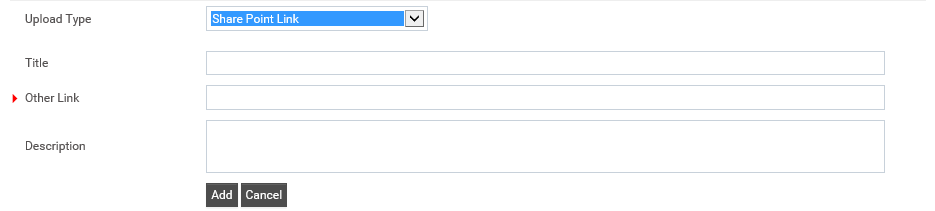
STEP 01: Select ‘Share Point Link’ from Upload Type dropdown.
STEP 02: Enter a title for the link.
STEP 03: Specify the share point link in ‘Other Link’ text-box.
STEP 04: Add a description and click on ‘Add’ to upload the link.
Add an URL Link
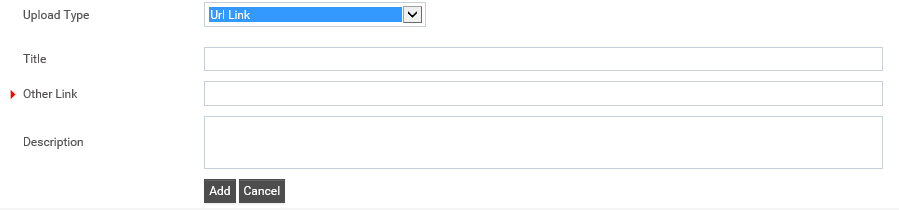
STEP 1: Select ‘Other link’ as the Link Type
STEP 2: Enter a title (if required) and the URL in 'Other URL' field.
STEP 3: Clicking the 'Add' button will include the URL to the list. Similarly, multiple links can be included.
|
The label names, upload fields and functionality available will depend on the system configurations completed by your administrator. |
Copyright © 2014-2015 CAMMS Online Help. All rights reserved.
Last revised: November 26, 2017